The easiest way to get started with Ostwind is to use the Ostwind Book App Starter. The starter bundles all of the dependencies we will need to stand up a web service. This tutorial uses the starter, and all of the code is available here. We will deploy and play with this example locally
Docker Compose
Ostwind Compose is a tool for setting up and running a full-fledged Ostwind instance Docker application. With Compose, an Ostwind application is backed by a real MySQL meta store and an in-memory OpenStack Swift service. With a single command, we will be able to create and start all the services from Ostwind. It’s the quickest approach to get a taste of Ostwind.
Ostwind Compose works in all environments: production, staging, development, testing, as well as CI workflows. You can learn more about it from source code.
Using Ostwind Compose is basically a three-step process:
- Package Ostwind at project root with
mvn clean package - cd into compose top directory and fire-up
docker compose up - hit Ostwind at
http://localhost:8080/v1/metadata/graphql?query={metaData(fileId:%221%22){fileName}}with your favorite browser
For more information about the Ostwind Compose the Compose file definition.
Ostwind Compose has ability for managing the whole lifecycle of an Ostwind application:
- Start, stop, and rebuild services
- View the status of running services
- Stream the log output of running services
- Run a one-off command on a service
Extending Ostwind Compose
Happy with Ostwind? You can go further with productionizing Ostwind from here
If you would like to go from basic Ostwind Compose setup and changed anything, rebuild it with
docker compose up --build --force-recreate
Ostwind Compose has been tested with MySQL 5.7 connected using mysql-connector-java 5.1.38 within Ostwind running on Jetty 11.0.15.
?autoReconnect=true&useSSL=false is in connection string. For example,
jdbc:mysql://db:3306/Ostwind?autoReconnect=true&useSSL=falseMySQL Container (Meta Store)
Ostwind Compose uses MySQL 5 as the backing meta store, i.e. the database that DataFetcher is talking to for file metadata.
The MySQL instance is network-reachable at 3306 inside compose and 3305 for host (wo choose 3305 just in case 3306 has already been occupied)
Networking in Ostwind Compose
By default Ostwind Compose sets up a single network. Both Ostwind and MySQL container services join this default network and is both reachable by other containers on that network, and discoverable by them at a hostname identical to the container name.
For example, inside docker-compose.yml
services:
  web:
    build: .
    ports:
      - "8080:8080"
    depends_on:
      db:
        condition: service_healthy
  db:
    image: "mysql:5.7"
    ports:
      - "3305:3306"
    volumes:
      - "./mysql-init.sql:/docker-entrypoint-initdb.d/mysql-init.sql"
    environment:
      MYSQL_ROOT_PASSWORD: root
    healthcheck:
      test: mysqladmin ping -h localhost -u root -proot
      timeout: 3s
      retries: 3
When you run docker compose up, the following happens:
- A network called “ostwind-example-books” is created.
- An Ostwind container is created using ostwind-example-books configuration. It joins the network “ostwind-example-books” under the name “web”.
- An MySQL container is created using
db’s configuration. It joins the network “ostwind-example-books” under the name “db”.
Each container can now look up the hostname web or db and get back the appropriate container’s IP address. For
example, web’s application code could connect to the URL mysql://db:3306 and start using the MySQL database.
Production
Creating a Deployable War File
We build the “.war” File first by navigating to ostwind project root and compile the project
cd ostwind/
mvn clean package
Successfully executing the command above shall generate a “.war” file under
ostwind/ostwind-examples/ostwind-example-books/target/ostwind-example-books-<ostwind-version>.war, where is the version of
the ostwind, for example 1.0.2, please make sure to replace <ostwind-version> with one of
our release versions.
Setting Up Jetty
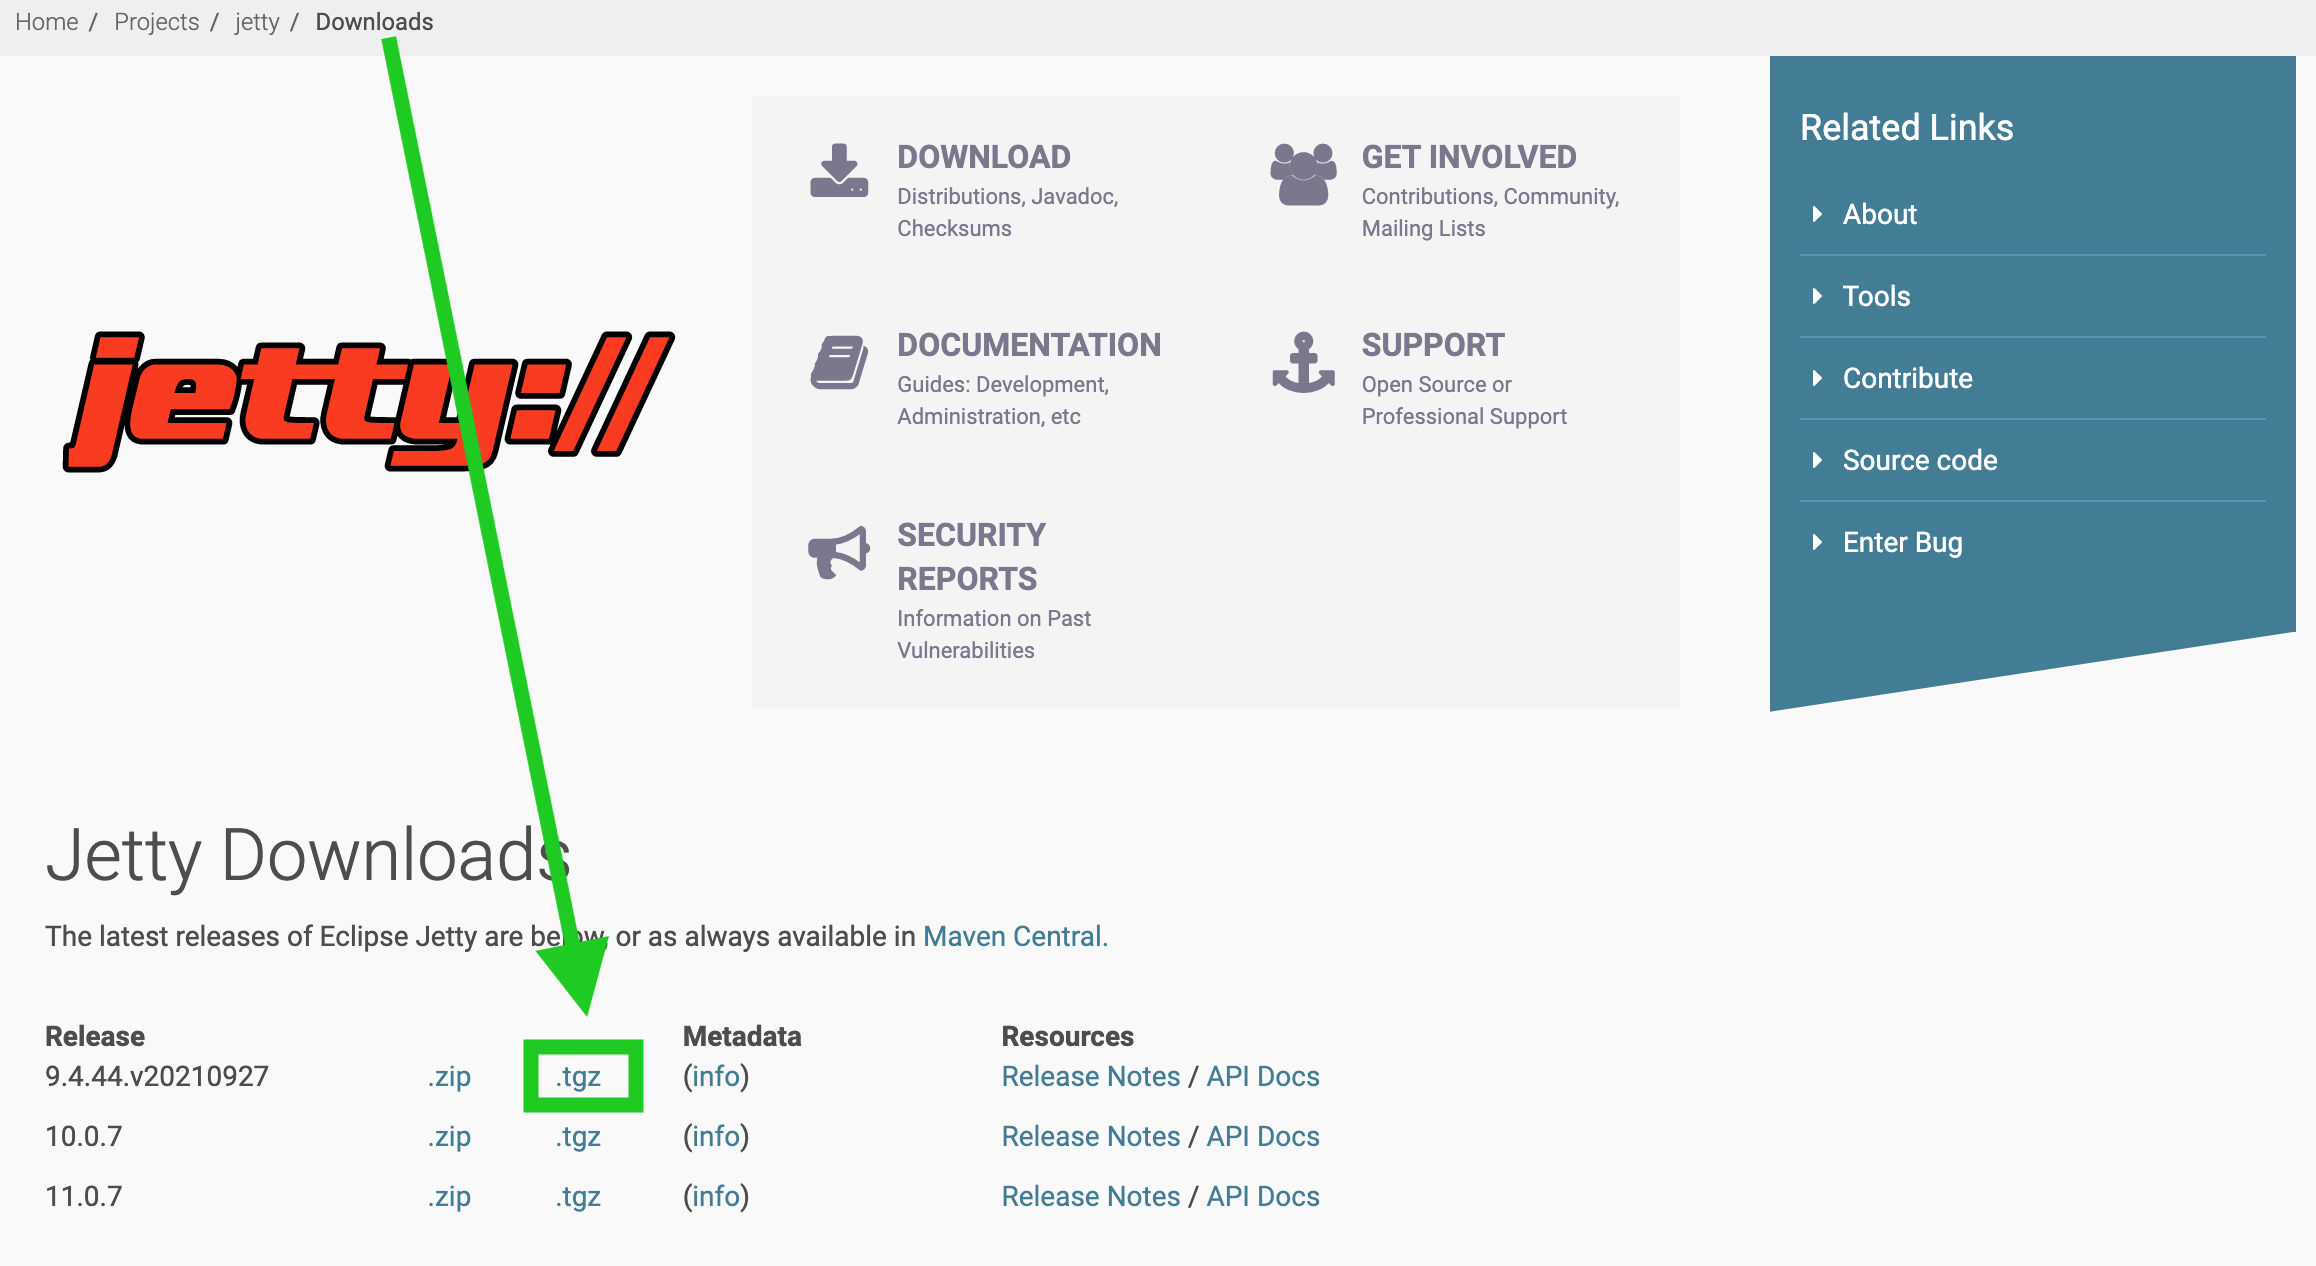
Downloading Jetty
At download page, pick up a .tgz distribution, we will use
“9.4.44.v20210927” release as an example:
Installing Jetty
Put the tar.gz file into a preferred location as the installation path and extract the Jetty binary using
tar -czvf jetty-distribution-9.4.44.v20210927.tar.gz
Dropping the “.war” File into the Jetty “webapp”
cd jetty-distribution-9.4.44.v20210927/webapps/
mv /path/to/.war .
Then rename the war file to “ROOT.war”, the reason of which is so that the context path would be root context - /,
which is a common industry standard.
The context path is the prefix of a URL path that is used to select the context(s) to which an incoming request is
passed. Typically a URL in a Java servlet server is of the format
http://hostname.com/contextPath/servletPath/pathInfo, where each of the path elements can be zero or more “/”
separated elements. If there is no context path, the context is referred to as the root context. The root context
must be configured as “/” but is reported as the empty string by the servlet
API getContextPath() method.
How we set the context path depends on how we deploy the web application (or ContextHandler). In this case, we
configure the context path by naming convention:
If a web application is deployed using the WebAppProvider of the DeploymentManager without an XML IoC file, then the name of the WAR file is used to set the context path:
- If the WAR file is named “myapp.war”, then the context will be deployed with a context path of
/myapp - If the WAR file is named “ROOT.WAR” (or any case insensitive variation), then the context will be deployed with a
context path of
/ - If the WAR file is named “ROOT-foobar.war” (or any case insensitive variation), then the context will be deployed with a context path of / and a virtual host of “foobar”
Starting the Webservice
cd ../
java -jar start.jar
To specify the port that container exposes for our app, we could use
java -jar start.jar -Djetty.port=8081
Firing The First Request
brew install --cask graphiql